Dragon IEM Cables: How to Pick the Best Cable for your IEMs

IEM Cables for Your 2-pin, 4-pin & MMCX Connections
Here at Moon Audio we make Dragon Audio Cables for every audiophile setup and our Dragon IEM Cables will transform the sound of your 2-pin, 4-pin, and MMCX connector IEMs.
You might be asking yourself, "Why would I upgrade my cable? I already have one." Well, the honest truth is that sometimes for manufacturers, the stock cable is an afterthought. They spend so much time and money creating the perfect pair of IEMs that when it's all set and done the resources left for an IEM Cable are limited. Now that's not to say that manufacturers are pairing $5 cables with $1,5000 IEMs, but nonetheless, your best IEMs will benefit from an aftermarket high-end cable.
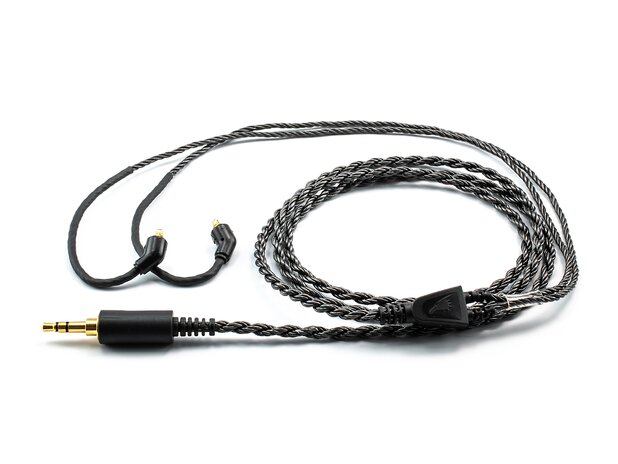
Every link in your signal chain is important — From the source device to the headphones, eartips, and all the way down to the audio cables you use to connect it all. Here at Moon Audio, we make audio cables for just about every audiophile setup imaginable and our Dragon IEM Cables are designed specifically with those tiny in-ear monitors in mind. We've designed three IEM cables, a Silver Dragon, Bronze Dragon, and Black Dragon cable that each possess a unique sound signature allowing you to tailor your listening experience and change the coloration of your favorite IEMs.
Discover our Dragon IEM Cables (2-pin IEM Cable, 4-pin IEM Cable, MMCX IEM Cable) and learn valuable information on how to safely connect our cables to your IEMs. Choose from an array of connectors designed to fit your favorite DAPs, DACs, Amps, and more. Check out the end of this blog for a list of all compatible 2-pin, 4-pin IEMs, and MMCX IEMs. Don't see your IEMs on the list? Contact us today and we'll confirm for you!
Custom Dragon IEM Cables: Everything You Need to Know
Why Dragon IEM Cables?
We always say that the weakest link in your signal chain is the audio cable. It's that exact frame of mind that prompted Moon Audio CEO and Founder Drew Baird, P.E., to create our Dragon Audio Cables.
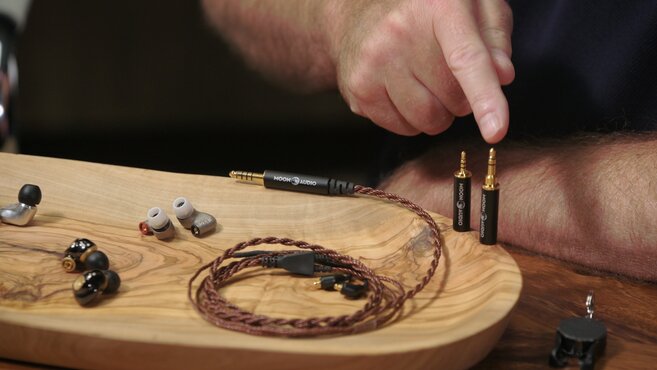
"We created our cables to provide a solution for connections that aren't standardized. There's no standardization in audio and everybody is using different connectors. So it's about providing the ability for people to connect no matter what and creating adapter systems. Say you've got five different connector types, we can provide a solution so you can connect to anything and starting out that was big more so in portable audio than in-home or any other type of audio setup," said Drew Baird, P.E.
"You'll notice right off the bat when you change out a stock cable, no matter what the product is, headphones or IEMs, you'll get a little bit of extra gain with the Silver Dragon. It's also going to be cleaner and clearer sounding — Think of it as a filter in your house cleaning the air."
"If you've got an IEM that you love, but the top end has a little too much sizzle, the copper conductor Bronze Dragon will smooth that out and add musicality and warmth to everything — Not just the wire, but capacitors and resistors and inductors, everything that's in the electrical circuit has coloration to it."

Silver Dragon IEM Cable
Clear | Detailed
- 8 x 99.99998% UP-OCC Stranded Silver Conductors with Kelvar treatment
- Available in 2-pin and 4-pin connection
- Available in MMCX connection

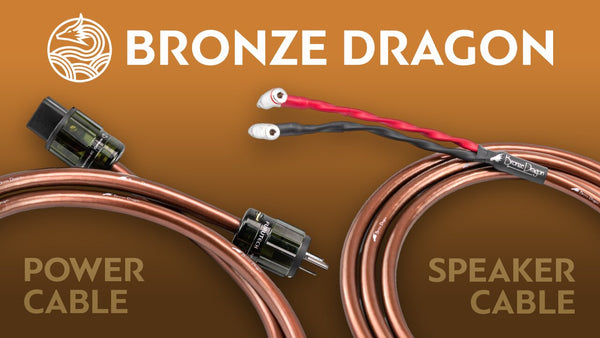
Bronze Dragon IEM Cable
Musical | Inviting
- 99.99998% UP-OCC Stranded Copper Conductors with Kelvar reinforcement
- Available in 2-pin connection
- Available in MMCX connection

Black Dragon IEM Cable
Warm | Flexible
- 8 x 15-18% ratio Silver-Plated Pure Copper Conductors
- Available in 2-pin and 4-pin connection
Top IEM Brands Compatible with Dragon IEM Cables
Our 2-pin IEM cable and 4-pin Dragon IEM Cables are compatible with just about every hifi IEM brand out there. Looking for an upgrade cable for Astell&Kern IEMs? We've got you! What about Empire Ears? We've got that too. Our MMCX IEM Cables are specifically designed to fit Astell&Kern, Campfire Audio, Etymotic, Meze Audio, Sennheiser, and Shure IEMs.
Explore our full list of compatible IEMs at the end of this blog and don't hesitate to reach out to us if you don't see your IEM on the list.
Silver Dragon IEM Cable
The Silver Dragon is our top-of-the-line flagship audio cable. Starting at $350, it's the most expensive earphone cable in this lineup and that's because of the high-quality materials we proudly use like UP-OCC pure silver conductors. UP-OCC metals are void of impurities and are optimized for signal transfer, conductivity, and sound quality. The Silver Dragon is the perfect choice for the critical listener who wants the most clear, articulate listening experience. It's designed to maximize the amount of detail, clarity, air, and instrument separation you get from your listening experience. It's made with only the purest UP-OCC silver conductors - that's 99.99998% pure - that clarify instrument separation, increase the soundstage, and find previously lost high and mid-frequency sounds. It's a smooth and clean-sounding cable that will balance warm or dark-sounding IEMs, providing the perfect amount of clarity that delivers an accurate reflection of the music. The bass is tight and well-controlled, with more layers of resolution than any other Dragon Audio Cable we've produced.

Silver Dragon Sound Signature
Silver strands clarify instrument separation, increase soundstage, and find previously lost high and mid-frequency sounds. Transients appear more cohesive and the bass is tighter for a more controlled sound. The detail and clarity of the Silver Dragon make it a perfect match for classical music and other genres with many nuanced instruments.

Silver Dragon IEM Cable V2 (2 or 4 Pin)
The Silver Dragon IEM Cable V2 is compatible with most 2-pin and 4-pin IEMs from top brands like Empire Ears, JH Audio, Noble Audio, and more. For the full list of compatible 2-pin and 4-pin IEMs, please refer to the product page. We enjoy the Silver Dragon with the Empire Ears ODIN but it's ultimately up to personal preference. Made with only the purest UP-OCC stranded silver, the Silver Dragon IEM Cable V2 will leave nothing between you and your music so you can enjoy your favorite songs just the way the artist intended. The Silver Dragon IEM Cable V2 features a 45-degree angle on the lead. This effectively wraps the cable up and around your ear for more comfort and better sound.
You can enjoy the Silver Dragon with all genres but it pairs especially well with classical, jazz, blues, Americana, folk, and other music with lots of nuance and instrumentation.
Silver Dragon MMCX IEM Cable
Not only do we offer the Silver Dragon IEM Cable V2 for 2-pin and 4-pin but we also offer a Silver Dragon IEM Cable with MMCX connectors, made to fit Astell&Kern, Campfire Audio, Etymotic, Meze Audio, Sennheiser, and Shure IEMs. After several years of research and development, we've redesigned and perfected our MMCX IEM Cable to bring a stable and snug-fitting MMCX connection. With a stronger, more reliable design, the new connector is now angled for better comfort. We've also implemented formable tubing that delivers more comfort for eyeglass-wearing.
The Silver Dragon IEM Cable with MMCX connectors is sonically identical to the Silver Dragon IEM Cable V2— You'll get the same detailed and resolute sound. This cable can be used in a single-ended or balanced design, and the wire is soldered to a connector using high-quality Cardas silver solder. We enjoy pairing the Silver Dragon MMCX IEM Cable with the Sennheiser IE900 earphones, which is an incredibly articulate and detailed IEM. The two paired together are the perfect recipe for crisp, clear vocals and provide great clarity to podcasts, YouTube videos, movie soundtracks, and music streaming.
Bronze Dragon IEM Cable
The Bronze Dragon is full of warmth and musicality. Starting at $200, it's the warmest cable in this lineup that delivers you a fuller, balanced sound with warmth and detail. The Bronze Dragon will improve the presentation of your bright or thin-sounding IEMs, resulting in a musical and inviting sound with a bigger body. Stranded UP-OCC copper conductors warm, expand, and strengthen the bottom end of instruments like bass guitars and cellos, as well as deep vocals. The Bronze Dragon has enough warmth and fullness to create the muscle needed to round out a flat sound signature. The bass will have more weight to it without being bloated or lush sounding. Enjoy vocal-centric genres, acoustic, folk, blues, Americana, and more with the Bronze Dragon IEM Cable.


Bronze Dragon Sound Signature
With a warm presentation, Bronze Dragon strengthens the bottom end without becoming bloated. Bass guitar and cello are full and immersive, creating a musical that's not too lush. The warmth and fullness of the Bronze Dragon create the muscle needed to round out a flat signature.

Bronze Dragon IEM Cable
If you want a fuller and more impactful listening experience, upgrade to the Bronze Dragon IEM Cable that's compatible with 2-pin IEMs. The Bronze Dragon two pin IEM Cable is not available for 4-pin IEMs. The presentation of the Empire Ears ODIN is organic and clear and the Bronze Dragon adds warmth to the ODIN while also providing some fullness to the midrange, particularly vocals making them more emotive and rich.
Designed for two pin male IEMs, the Bronze Dragon IEM features a 45-degree angle on the lead. This effectively wraps the cable up and around your ear for more comfort and better sound.
Bronze Dragon MMCX IEM Cable
As mentioned earlier with the Silver Dragon, we've also created a Bronze Dragon IEM Cable with MMCX connectors, starting at $215, so you can enjoy that musical sound with your MMCX IEMs. Sonically the Bronze Dragon MMCX IEM Cable is identical to the 2-pin Bronze Dragon IEM Cable. The Bronze Dragon adds more bottom-end weight to the Sennheiser IE900 IEMs so you get a more impactful bass response and a musical sound that's warm but doesn't muddy the details and clarity. The Bronze Dragon MMCX IEM Cable is available for Astell&Kern, Campfire Audio, Etymotic, Meze Audio, Sennheiser, and Shure IEMs with MMCX connections.
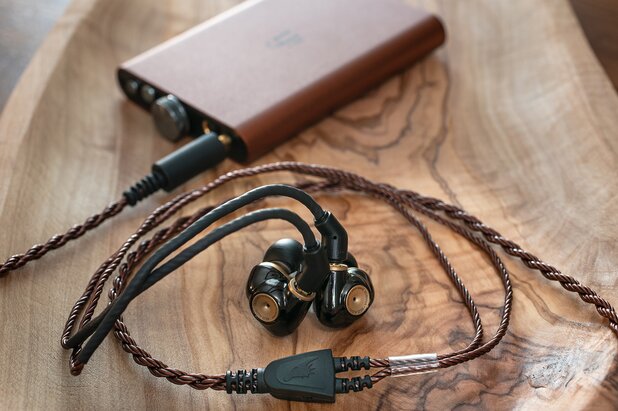
Pictured: Moon Audio Bronze Dragon MMCX IEM Cable with Meze ADVAR IEM and ifi HIP DAC 2
Black Dragon IEM Cable
The Black Dragon boosts detail while adding bottom-end weight delivering a lush, but not laid-back, sound. The silver-plated copper conductors increase clarity and resolution while providing a bump in warmth and fullness. You get the clarity and detail of the Silver Dragon with the nice warmth and fullness of the Bronze Dragon, all wrapped up into a single IEM Cable. The Black Dragon is great for V-shaped IEMs or bass-light IEMs, adding musicality and warmth while balancing out the higher frequencies and tightening up the bottom end. The detail and expansiveness of the Black Dragon IEM Cable V2 make it a flexible fit for a broad range of musical genres like rock, folk, jazz, classical, and "fun" music like pop.

Black Dragon Sound Signature
The Black Dragon marries the sonic strengths of the Silver Dragon and the Bronze Dragon IEM Cable, delivering a warm and smooth sound with a musical presentation. Copper strands enhance the body, shape, and immediacy of the music, while silver enhances detail and clarity. The detail and expansiveness of the Black Dragon make it a flexible fit where a broad range of musical genres are played.

Black Dragon IEM Cable V2
Starting at $200, the Black Dragon IEM Cable is the perfect meld of the Silver and Bronze Dragon sound signatures. It strays away from our traditional design practices of using UP-OCC silver or copper conductors and features a specific ratio of 15-18% silver plating. Typically silver plating on a normal audio cable is about half a percent but the Black Dragon's heavy silver plating serves a purpose. This specific ratio of silver-plated copper conductors enhances the sonic attributes and characteristics of the Black Dragon to its maximum potential. It provides a very smooth, detailed top end with a great sense of presentation that complements just about any IEM no matter the tonality.
Unlike the Silver Dragon, our Black Dragon IEM Cable is only available for 2-pin and 4-pin connections, so that means there's no MMCX option available. If you're looking for the sound of the Black Dragon with your MMCX connections, we typically recommend the Bronze Dragon MMCX IEM Cable, but as we always say, everyone hears differently. The Black Dragon is going to boost the Empire Ears ODIN's sound, elevating it from natural and organic to lush and full-sounding.
Most stock headphone cables are made of poor, ultra-thin conductors that work as a bottleneck for sound. Poor geometries, no shielding, rubber jackets, and a whole host of other issues in OEM cables can limit the performance of the headphone driver in terms of clarity and definition.
Dragon Audio Cables are handcrafted from quality materials in Moon Audio's headquarters in Cary, North Carolina. All of our cables are created with ultra-pure, single-crystal silver, and copper strands and engineered to provide the cleanest, most musical presentation. Our wire is void of impurities and crystalline boundaries, leaving nothing between you and your music.
What is UP-OCC?
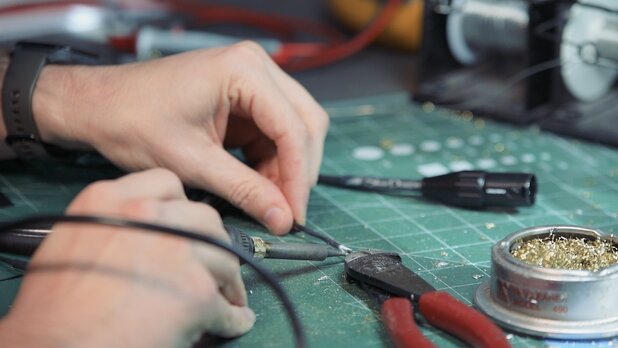
UP-OCC stands for Ultra Pure Ohno Continuous Casting (OCC). This is not a material but a way of extruding silver and copper to prevent any impurities and fractures in the crystalline structure of the wire. The wire is drawn very slowly to cast as an almost perfect single crystal small diameter conductor. The resulting purity and the size of the cast wire makes a tremendous difference and there is less damage to the near-perfect cast state. We find this UP-OCC process produces a very clean and close to neutral sound in our copper-based and silver-based cables.
Premolded Amplifier Connections
We offer three standard audio cable connector options, a 3.5mm single-ended, 2.5mm balanced, and 4.4mm balanced. These connectors are available premolded, built with durability to last.
- 3.5mm straight or right angle 3 pole stereo single-ended connection for use with most common portable devices
- 2.5mm balanced 4 pole gold straight mini plug for use with the balanced output of the Astell&Kern players, RAL players & ALO amps. The entire body is molded to prevent the face of the connector to short to the chassis ground. This will eliminate issues of ground shorts.
- 4.4mm balanced 5-pole gold straight plug for use with the balanced output of the Astell&Kern, Sony, and iBasso Digital Audio Players.
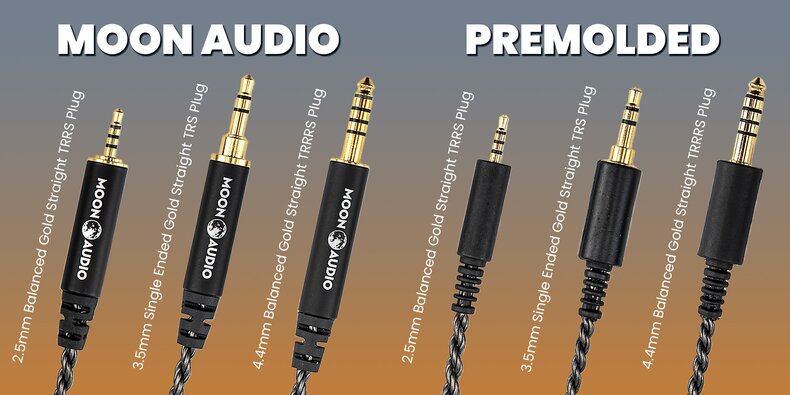
Both of the 3.5mm connectors have extended necks to vanquish most portable devices that have a deep connector socket hole. Premolded connections are available for immediate shipment, but we also offer custom termination options! Feel free to reach out to us if you don't see the connector you need listed. We might just have it!
You found your dream in-ear monitors, and you've chosen the Dragon Cable that speaks to your sound preferences. Whether you've opted for a pair of universal fit IEMs or a set of custom IEMs, all you need to do is connect your cable to your IEMs.
Understanding IEM Pins and Sockets
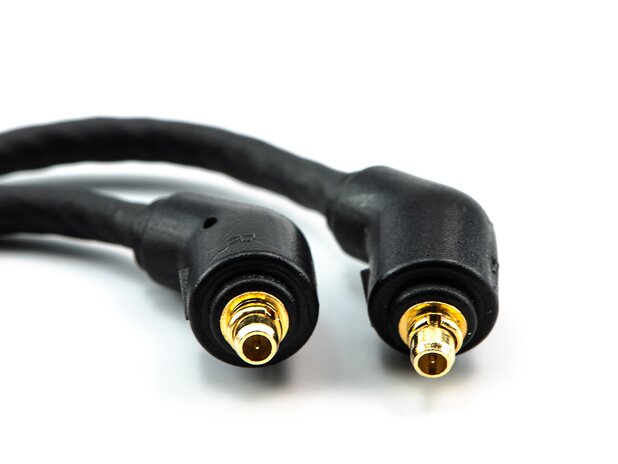
Dragon IEM Cables use .78mm pins. This is the most popular pin/socket size. Some manufacturers use a slightly smaller pin and socket. You can put a larger pin in a smaller socket, but once the socket expands, you can't go back to a smaller pin.
There are two types of sockets: flush mount and recessed. In the former, connectors are flush with the outside of the earpiece. This allows the manufacturer to fit more technology inside of the IEM, and it is what most manufacturers use.
While Dragon IEM cables are designed to best fit recessed mounts, they fit very well with flush mounts. When you first insert the connectors, they won't go in all the way; don't force them. The inside of the socket is a clamshell. As you insert the connector, it expands. This lets the connectors fit deep inside the socket and prevents bending of the pins. Don't force the pins, as they can bend. If they do bend, you can gently bend them back into alignment. Contact us for specific instructions on how to do this.
Connecting Your 2-Pin Dragon IEM Cable
Dragon IEM V2 Connection Instructions
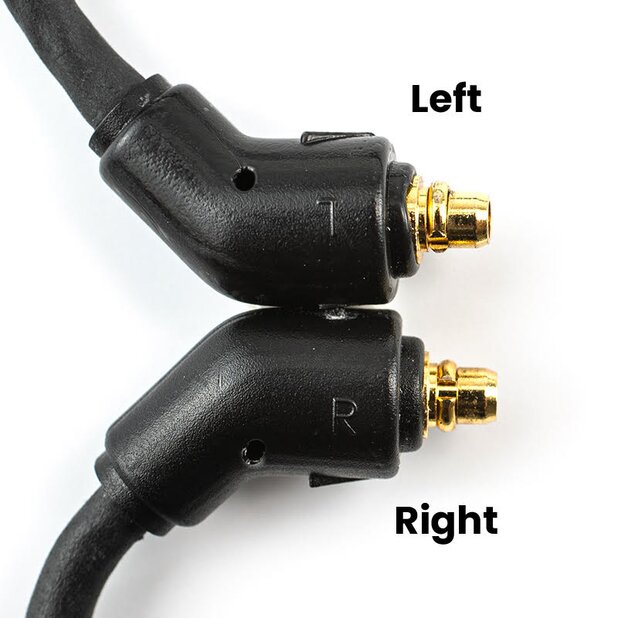
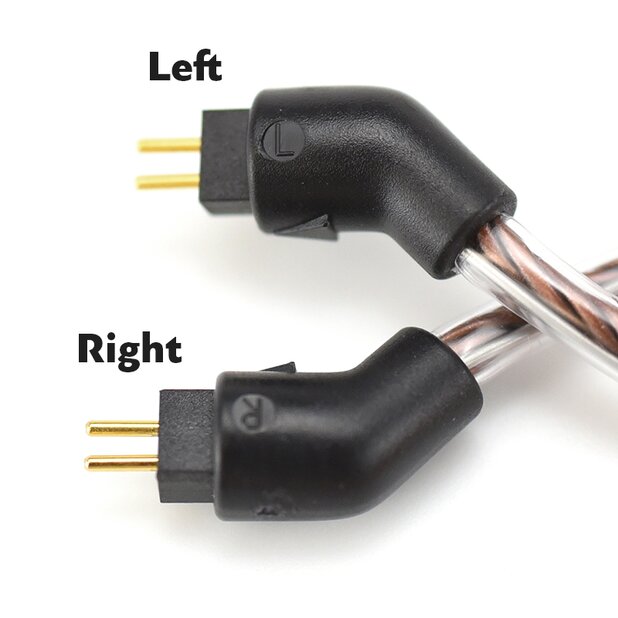
1) Look for the embossed L and R on the plastic part of the connector. These need to match up with the left and right ear pieces on your IEMs.
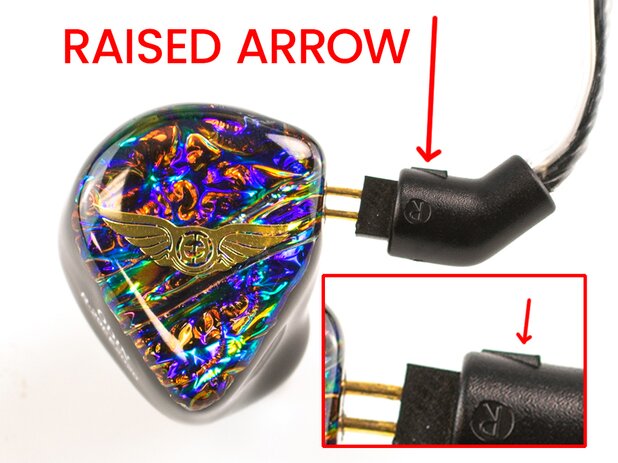
2) Look for the rasied arrow on the top of the connector. The arrow needs to face up to the sky for the correct polarity of the IEM.
3) With the curve of the connector pointing upward, slide the connector with an "R" marking straight into the right IEM until flush with the shell. Repeat with the "L" marking and the left IEM.
4) Remove the connectors by pulling and gently wiggling.
Dragon IEM V1 Connection Instructions
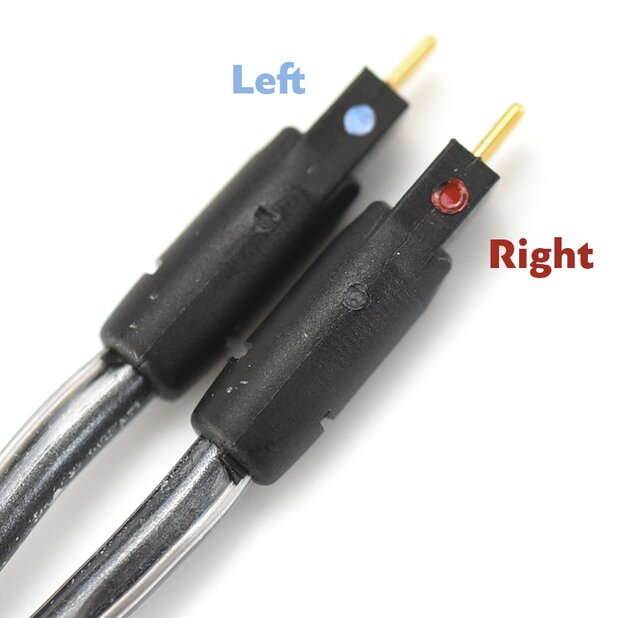
1) Instead of L and R, older Dragon V1 Cables have a red dot for the right channel and a blue dot for the left channel. These need to match up with the left and right ear pieces on your IEMs.
2) The red and blue dots need to face up to the sky for the correct orientation of the polarity of the IEM.
3) With the red dot facing upward, slide the connector straight into the right IEM until flush with the shell. Repeat with the blue dot and the left IEM.
4) Remove the connectors by pulling and gently wiggling.
Know your left IEM shell from your right
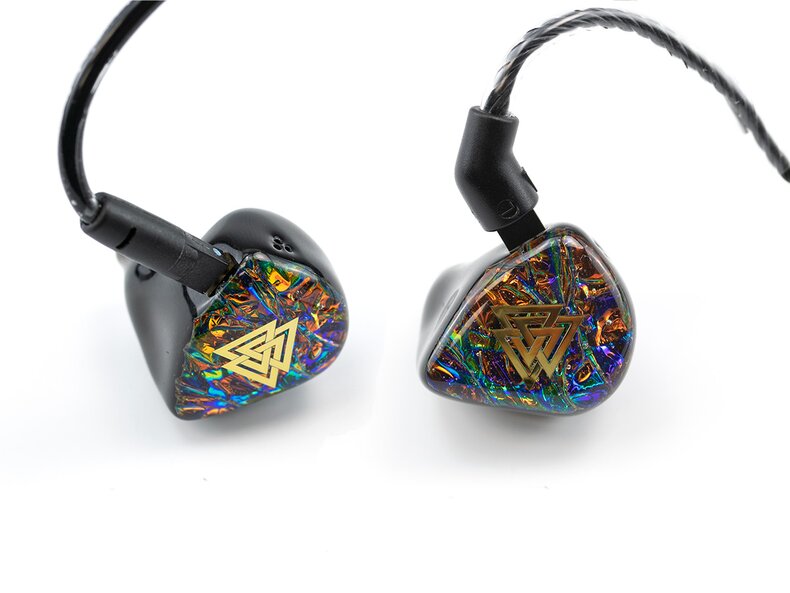
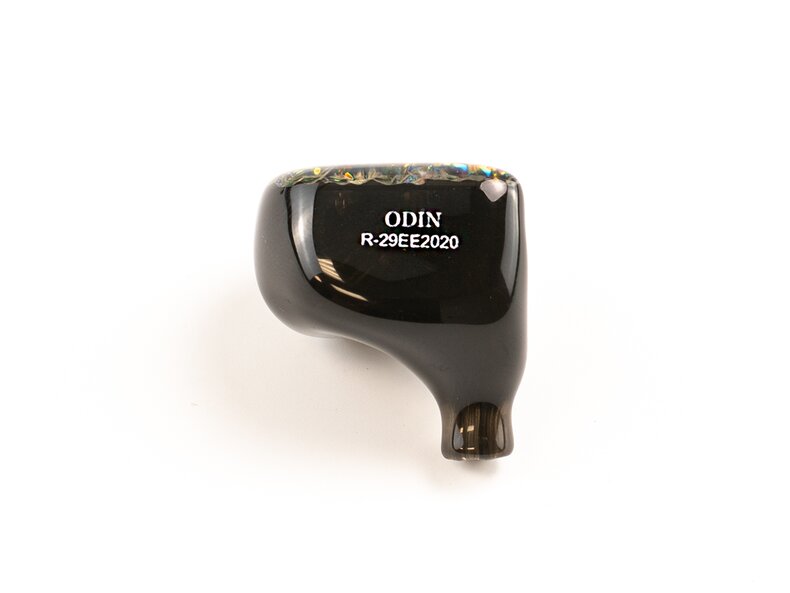
At left is the Empire Ears ODIN with an IEM V1 cable. The blue dot indicates that this connector goes to the left IEM shell. On the right is the ODIN connected to an IEM V2 cable. The L on the cable connecter indicates that this connector foes to the left IEM shell.
Other Connection Types: MMCX
After several years of requests from customers all over the world, we've relaunched our Dragon IEM Cables with MMCX Connections. We offer MMCX IEM Cables in our Silver Dragon and Bronze Dragon sound signatures, compatible with the following IEMs: Astell&Kern, Campfire Audio, Meze Audio, Sennheiser, and Shure.
Available Amplifier Connections
- L Symbol is the Right Channel
- R Symbol is the Left Channel
- The Arrow Symbol should always be pointing in an upward direction
With the curve of the cable pointing upward, slide the connector with an "R making it straight into the right IEM until flush with the shell. Repeat with the "L" marking and the left IEM. You should hear or feel a click as the connector latches to the IEM.
Compatible IEMs List
Compatible 2-pin IEMs
Compatible 4-pin IEMs
All custom JH Audio IEMs with a 4-pin connection, including 13v2, 13v2 Pro, 16v2, 16v2 pro, Angie, Layla, Lola, Roxanne, Sharona
Compatible MMCX IEMs
Verdict
Every Dragon Audio Cable is proudly made in the USA, handcrafted daily in our Cary, NC headquarters. We customize cables for virtually every pair of headphones and IEMs on the market, so if you're ready to upgrade your stock IEM cable then look no further than our Dragon Audio Cables. By providing three sound signature options, you get to choose how you want your IEM to sound. Our Silver Dragon IEM Cable is clear and detailed, adding clarity and top-end resolution to your IEMs. For a fuller-bodied sound, the Bronze Dragon IEM Cable adds musicality and bottom-end weight so you can immerse yourself in the music. The Black Dragon IEM Cable is the best of both worlds, combining the sonic characteristics of the Silver Dragon and Bronze Dragon for a warm, flexible sound that doesn't compromise detail retrieval. Whether you're looking for a two pin IEM Cable, 4-pin IEM Cable or MMCX IEM Cable we've got an iem upgrade cable for you.
Think of it as giving your IEMs a second life. While you can purchase a new IEM every time you've outgrown the sound of your current pair, give our Dragon IEM cables a try and fall in love with your IEMs all over again. You'll never get tired of your IEM's sound when you can alter the coloration and bounce between.
Related Videos
Dragon MMCX IEM Cables: Everything You Need to Know
Custom Dragon IEM Cables: Everything You Need to Know
Empire Ears Triton IEMs Launch Edition Unboxing


