null

How To Setup Your Matrix Audio Element M

Matrix Audio Element M Headphone Amplifier and Streamer


ABOUT THE MATRIX AUDIO ELEMENT M

With the introduction of the Element M, Matrix Audio improved upon the Element I’s design. The Element M strikes a balance with the I and furthers its design elements while improving the performance and functionality of it all at a quality price point. Like other Element products, the device is packed with numerous features making it one of the most versatile music streamers on the market.

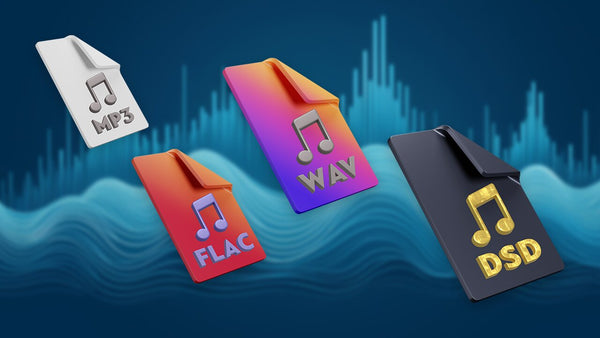
The Element M has a sampling rate support of up to 768 kHz and DSD up to 22.4 MHz The Element also supports a TF card slot storage capability. This option provides the player with three storage options instead of only two. Lastly, the Element M is equipped with a Linear 30W power supply that regulates the output voltage by dropping excess voltage. Linear regulated power supplies like this one in the Element M have an incredibly low noise floor, which is one of the reasons why the Element M sounds so great.

The Element M is optimized for MQA decoding and rendering. MQA is a British technology that delivers the sound of an original master recording. The master file is then fully authenticated and made small enough to stream or download.

The headphone amp in the Element M contains an input stage that rejects common-mode distortion. The output stage of the amp is set in a high quiescent current state that gives off a mellow sound performance. It also has a ES9028 PRO DAC The ES9028 is a quality DAC designed to meet the demands of high quality and performance that a SABRE DAC can give, but at a more economical price point.

As sophisticated as the Element M is on the inside, the outside is no different. It is constructed with a double shell with the inner shell consisting of galvanized steel and the outside made of 4mm aluminum. By focusing on the materials, Matrix Audio was able to minimize the vibrations of the music player, thus reducing case resonance as well. The Element M is Matrix Audio’s mid-range product for the entire product line and their most cost-effective network streamer. It’s by no means a budget device and competes with some of the best music streamers on the market.


SPECIFICATIONS

  • Digital-to-Analog Converter: Quad-Core DAC – ES9028 PRO
  • USB Chip: XMOS XU216: PCM 16-24bit 768kHz, DSD 11.2MHz (DoP), DSD 22.4MHz (Native)
  • Clock: SiTime Low Phase Noise Clock
  • Digital Input: Optical (x1), Coaxial (x1), IIS LVDS (x1), USB (x1)
  • Line Out: RCA (x1), XLR (x1)
  • Headphone Out: ¼” TRS (6.35mm)
  • Output Level: 1320mW @33ohm; 248mW @ 300ohm; 124mW @ 600ohm
  • Network: LAN: 10BASE-T / 100BASE-TX, WLAN: 2.4GHz/5GHz, IEEE 802.11 a/b/g/n/ac standard
  • Sampling Rate Support: PCM up to 768kHz, DSD up to 22.4MHz; MA Player: PCM 768kHz / DSD 512; Roon: PCM 768kHz / DSD 256*; DLNA: PCM 768kHz / DSD 512
  • Volume Control Mode: Digital Volume
  • USB Storage: TF Card Slot (x1), USB Host (x2)
  • Supported Formats: MP3, WMA, WAV, AIF, AIFC, AIFF, AAC, FLAC, OGG, APE, ALAC, M4A, DSF, DFF. MA Player, AirPlay/DLNA, Roon Ready, Full MQA Support, IR Remote.
  • Power Supply: Linear 30W
  • Dimensions: 10.9” x 11.1” x 2.4” (275 x 281 x 60mm)
  • Weight: 8.1lbs (3.7kg)

*Sampling Rate of PCM 768kHz / DSD 256 with Roon requires the latest A10301 firmware update. Earlier firmware versions support PCM 384kHz / DSD 128.


SETUP AND CONFIGURATION

If setting up your device for a wireless connection, place you Element M in an open area of your home or in a location where the device will not receive interference from alternative wireless sources. For the most stable connection, we recommend setting up your Element M via a wired connection (LAN).

If you are setting up and WLAN connection, please install the antenna on the back of the Ethernet console in an upright position. If setting up a LAN connection, place an Ethernet cable into the jack located in the rear, right-hand corner of the Element console. Connect the Element M to your ISP device.

Reference the following video on how to set up your Element M to either a wired or wireless network:

Regardless of the connection configuration, download the Matrix Audio Remote application to control your Element M.

Once the Matrix Audio Remote is downloaded, plug in your Element M into the power supply, power on, and wait for it to be recognized by the Matrix Audio Remote application. There are three ways to connect and configure your device in the MA remote application: WLAN, Automatic, and Manual.

Select WLAN configuration, if you want to connect your Element M streamer to a wireless network

Select the Automatic connection, if your Element M has been connected to a LAN and you wish to add and search for devices automatically

Select the Manual connection, if your device is already connected and you’d like to manually enter the device’s IP address

Your basic steps in setting up your Element M for the first time:

  1. -Power on. The LED indicator will turn on following the connection to the power supply. By default, the device enters Standby mode when connected to power. Pressing the Standby button on the unit body or the remote control will power on the Element M, as signified by the LED indicator turning to a highlighted white color.

  2. -Select the input source. Repeat pressing the menu button (three horizontal lines) and select the input channel selection menu. Then rotate the knob to select between auto, coaxial 1, coaxial 2, optical 1, optical 2, IIS, LVDS, USB audio, or network. Press the knob to confirm the selection. If you are unsure what input to select, choose “auto” and the device will automatically scan all digital input channels. The first connected input channel will be locked immediately. The Element M will continue to scan other channels until the current signal is lost. When there are several input channels being connected, the Element M will always choose the signal it detects first after scanning in the following order:. COAX 1 > COAX 2 > OPT1 > OPT2 > IIS LVDS > USB > Network. When using network related music sources such as AirPlay, DLNA, Roon, or MA Player, please select Network as the input channel.

  1. -Select the output channel. Repeat pressing the menu button (three horizontal lines) and select the output channel selection menu. You can select output channel between balanced headphone output, single-ended headphone, and line output. Push the button to confirm your selection.

4. -Volume adjustment. The volume can be adjusted by the knob or the [speaker]- and [speaker]+ key on the remote control, and the screen will show the current volume level when adjusting. Line output and headphone output have different volume control level, as well as the line level output can be configured as a fixed level output.


COMPARISONS

ELEMENT X

ELEMENT P

ELEMENT M

ELEMENT I

COST

$3,419.00 USD

$2,869.00 USD

$2,049.00 USD

$1,149.00 USD

DAC

Quad-Core DAC: ES9038 PRO+ & ES9311

Quad-Core DAC: ES9028 PRO

Quad-Core DAC: ES9028 PRO

Dual-Core DAC: ES9028 PRO

USB CHIP

XMOS XU216: PCM 16-24Bit 768kHz; DSD 11.2MHz (DoP); DSD 22.4MHz (Native)

XMOS XU216: PCM 16-24Bit 768kHz; DSD 11.2MHz (DoP); DSD 22.4MHz (Native)

XMOS XU216: PCM 16-24Bit 768kHz; DSD 11.2MHz (DoP); DSD 22.4MHz (Native)

XMOS XU208: PCM 16-24Bit 384kHz; DSD 5.6MHz (DoP); DSD 11.2MHz (Native)

CLOCK

Crystek CCHD-950 Ultra Low Phase Noise Femtosecond Clock

Crystek CCHD-950 Ultra Low Phase Noise Femtosecond Clock

SiTime Low Phase Noise Clock

SiTime Low Phase Noise Clock

DIGITAL INPUT

Optical (x2); Coaxial (x2); IIS LVDS (x1); USB (x1)

Optical (x2); Coaxial (x2); IIS LVDS (x1); USB (x1)

Optical (x1); Coaxial (x1); IIS LVDS (x1); USB (x1)

Optical (x1); Coaxial (x1); IIS LVDS (x1); USB (x1)

LINE OUT

RCA (x1); XLR (x1)

N/A

RCA (x1); XLR (x1)

RCA (x1); XLR (x1)

HEADPHONE OUT

4-pin XLR; Dual 3-pin XLR; 1/4" TRS (6.25mm)

(Speaker Out): x2 (230W@4ohm)

1/4" TRS (6.25mm)

1/4" TRS (6.25mm)

OUTPUT LEVEL

1/4-in: 1150mW @33ohm, 308mW @300ohm, 152mW @600ohm; XLR: 1700mW @33ohm, 1180mW @300ohm, 650mW @600ohm

N/A

1320mW @33ohm; 248mW @300ohm, 124mW @600ohm

1320mW @33ohm; 248mW @300ohm, 124mW @600ohmText

NETWORK

LAN: 10BASE-T/100BASE-TX; WLAN: 2.4GHz/5GHz, IEEE 802.11 a/b/g/n/ac standard

LAN: 10BASE-T/100BASE-TX; WLAN: 2.4GHz/5GHz, IEEE 802.11 a/b/g/n/ac standard

LAN: 10BASE-T/100BASE-TX; WLAN: 2.4GHz/5GHz, IEEE 802.11 a/b/g/n/ac standard

LAN: 10BASE-T/100BASE-TX; WLAN: 2.4GHz, IEEE 802.11 a/b/g/n standard

SAMPLING RATE SUPPORT

PCM up to 768kHz; DSD up to 22.4MHz. MA Player: PCM 768kHz/DSD512; Roon: PCM 768kHz/DSD256*; DLNA: PCM 768kHz/DSD512

PCM up to 768kHz; DSD up to 22.4MHz. MA Player: PCM 768kHz/DSD512; Roon: PCM 768kHz/DSD256*; DLNA: PCM 768kHz/DSD512

PCM up to 768kHz; DSD up to 22.4MHz. MA Player: PCM 768kHz/DSD512; Roon: PCM 768kHz/DSD256*; DLNA: PCM 768kHz/DSD512

PCM up to 384kHz; DSD up to 11.2MHz. MA Player: PCM 384kHz/DSD256; Roon: PCM 384kHz/DSD128; DLNA: PCM 384kHz/DSD256

VOLUME CONTROL MODE

Hyper-Control Relays Array, Digital Volume

MUSES 72320 Resistor Divider

Digital Volume

Digital Volume

USB STORAGE

TF Card Slot (x1), USB Host (x2)

TF Card Slot (x1), USB Host (x2)

TF Card Slot (x1), USB Host (x2)

USB Host (x2)

SUPPORTED FORMATS

MP3, WMA, WAV, AIF, AIFC, AIFF, AAC, FLAC, OGG, APE, ALAC, M4A, DSF, DFF; MA Player, AirPlay/DLNA, Roon Ready, Full MQA Support, IR Remote

MP3, WMA, WAV, AIF, AIFC, AIFF, AAC, FLAC, OGG, APE, ALAC, M4A, DSF, DFF; MA Player, AirPlay/DLNA, Roon Ready, Full MQA Support, IR Remote

MP3, WMA, WAV, AIF, AIFC, AIFF, AAC, FLAC, OGG, APE, ALAC, M4A, DSF, DFF; MA Player, AirPlay/DLNA, Roon Ready, Full MQA Support, IR Remote

MP3, WMA, WAV, AIF, AIFC, AIFF, AAC, FLAC, OGG, APE, ALAC, M4A, DSF, DFF; MA Player, AirPlay/DLNA, Roon Ready, IR Remote

POWER SUPPLY

Noratel Linear 40W

Noratel Linear 25W

Linear 30W

20W AC Adapter

DIMENSIONS

13.4" x 11.1" x 2.4" (340x281×60mm)

13.4" x 11.1" x 2.4" (340x281×60mm)

10.9" x 11.1" x 2.4" (275x281×60mm)

9.5" x 8.7" x 2.2" (240x220×55mm)

WEIGHT

9.3 lb (4.2kg)

10.4 lb (4.7Kg)

8.1 lb (3.7kg)

3.3 lb (1.5kg)


FREQUENTLY ASKED QUESTIONS

How do I add my device in the Matrix Audio Remote App?

Here’s how you can add your device manually in the Matrix Audio Remote app:

Here’s how you can add your device wirelessly in the Matrix Audio Remote app:

Here’s how you can add your device automatically in the Matrix Audio Remote app:

Does the Matrix Audio Element M allow for external hard drive storage?

Yes, the Element M allows for external USB drives to be connected. Flash drives, SSD and HDD are all compatible as long as the main connection is via USB-A.

Please Note: Your music files on an external are local to the hard drive. Removing the hard drive will result in the files being removed from your library playback on the Matrix Audio remote application.

What headphone connections does the Element M have?

The Element M is equipped with a ¼” TRS input. You’ll need to make sure your headphone has a compatible connector. If you are not sure or want a custom cable created for your headphone, feel free to Contact Us and we’ll be more than happy to help you.

Is the Element M Roon Compatible?

Yes, all the Matrix Audio Element series products are Roon Ready Compatible.

Does the Element M have a remote control?

The Element M is equipped to be used by either a physical remote or a digital remote via a phone app called Matrix Audio remote. Both the physical remote and Matrix Audio remote app for the Element M allows the user to power the device on and off, select the input and output, adjust volume, and select what PCM filter they would like to use.

Does the Element M have a standby mode?

Yes. The Element M will enter sleep or standby mode after the selected digital audio channel has no input signal and no operation for more than 5 minutes. To completely turn off the Element M, press and hold the power button on the right-hand side of your machine and wait for the display to fade to black.

What are the PCM filters available on the Element M?

The Matrix Audio Element M streamer is equipped with 7 different PCM filter options:

  1. Mod1_fast roll-off, minimum
  2. Mod2_slow roll-off, minimum
  3. Mod3_fast roll-off, linear
  4. Mod4_slow roll-off, linear
  5. Mod5_brickwall
  6. Mod6_hybrid
  7. Mod7_apodizing

What do these filters do?

These filters are known as dithering curves and they shape the digital signal of your audio. The Mod 2 and 4 filters smooth out audio, while Mods 1 and 3 are more analytical. These filters bring out the nuances contained in music genres like Americana, Bluegrass, Jazz, and Acoustic music. The other 3 filters all do something different. The brick wall filter (Mod 5) has a sharp roll-off, The apodizing (Mod 7) has a smooth roll-off and the hybrid (Mod 6) filter has a bit of both Mod 5 & Mod 7 in its filter.

What cloud and internet radio services are available to access directly through the Element M?

The Element M supports direct access to streaming platforms Tidal & Qobuz.

What cloud and internet radio services are not available to access via the Element M?

The Element M does not support or serve as a direct access point for streaming platforms like Spotify or Pandora Radio. However, to use said platforms and others follow the instructions below:

  • Connect your Element M via tablet, iPhone, and desktop or personal computer.
  • Enable Apple AirPlay and select the Matrix Audio streamer that appears and have your streamer configured to USB audio or network as input.
  • Begin streaming from the appropriate app's desktop page or mobile app.

How do I contact Matrix Audio if I’m having a mechanical/technical problem with the Element M?

If you are having difficulties with your Element M, submit a product support ticket online at the following link.

Do I need to install thew antennas on the Element M?

The antennas that come packaged with the Element M are Wi-Fi antennas. If you are setting up a LAN connection with your Element M, the antennas won't be necessary for the operation of the device. Otherwise, you will need to install the antennas for wireless functionality. If you are setting up a WLAN connection and intend to use Airplay and other streaming apps and devices the antennas are necessary since they assist your Element M in sending and receiving strong signals and achieving optimal playback through your device.


HOW-TO QUESTIONS ANSWERED

How to adjust and interpret the volume control of the Element M

The volume for the Element M can be adjusted three ways, by the Matrix Audio remote app, the physical remote, or the dial on the right-hand side of the Element M. When you adjust the volume of your machine, the volume of the Element M increases and decreases by .5 dB.

**Please note: For every twenty-decibel increase or decrease in your machine, there is a small, almost inaudible click.

How to connect Tidal and Qobuz in the Matrix Audio Remote App

To connect Tidal and/or Qobuz on your Matrix Audio remote app, tap the streaming icon at the bottom of the app, select the appropriate streaming service you wish to connect, input your username and password in the respective spaces and tap add in the right-hand corner of the app on your smartphone.

How to add SMB Sharing Folders on the Element M

To add SMB sharing folders on the Element M, open your Matrix Audio remote app, tap the library icon, and tap files on the right-hand side of the screen. Tap the “Add SMB Sharing Folders” option in the middle of the screen. The page will ask for the path of the folder via the IP address, a username, and a password if applicable. When finished, tap the add button to complete the addition.

How to set cover/image settings in Matrix Audio Remote

To set the cover/images in the Matrix Audio remote app, tap the settings icon in the bottom right-hand corner of the app. Tap the cover settings option in the menu that appears. 3 choices will appear to select from:

  1. Clear album cover image cache - This will display the album cover after the default image has been cleared.
  2. Clear artist image cache - The artist image will display the default image after its cleared.
  3. Reacquire album art and arctic images - The app will re-cache the images in the background.

How to change the appearance of Matrix Audio remote App Interface

The Matrix Audio remote app has two appearance modes: light and dark. The appearance is comparable to that of Twitter’s light and dark modes. To change the appearance of your app tap the settings icon on the lower right-hand side of the app, scroll down to the Appearance theme tap again and select from either light or dark mode.

How to push music through AirPlay or Roon on the Element M

For instructions on how to push music through AirPlay or Roon, watch the video below:

NOTE: Here are the written instructions below:

To push music through your Element M with Airplay or Roon:

  1. First, select the network connection on your Element I using the turn dial
  2. Open your iPhone, swipe up and press the Airplay icon in the right-hand corner of your iPhone.
  3. Select your Element I device that appears in the drop-down menu
  4. Select your favorite music app to stream with and your music will begin playing

How to check for software updates on the Element M

To update or check for a software update on your Matrix Audio remote app with these steps:

  • Tap the settings icon on the bottom right-hand side of your app.
  • Scroll down until you see the “Check for update” option - on the right side of said option, the app will tell you whether your app is up to date.
  • If an update is required: Tap the option to do so and follow the prompts to complete the update.

How to change the PCM filter on the Element M

Reference the instructions below on how to change the PCM filter on the Element M with the physical remote, Matrix Audio remote app, and turn dial.

  • Physical Remote: To change the PCM filter via your physical remote, press the filter button on the bottom of your left. Watch the display on the Element to see the PCM filter options change. There are 7 to choose from. Once selected, press the turn dial and the display will return to regular function.
  • Matrix Audio remote app: To change the PCM filter with your Matrix Audio remote app, tap the remote icon in the upper corner of the app’s welcome screen. Go to the bottom of your remote and tap FILTER to select 1 of the 7 PCM filters and the streamer will display the filter you selected.
  • Turn Dial: To change the PCM filter on your Element M with the turn dial, press the button with the three lines next to it 3 times, turn the dial to the left to select 1 of the 7 filters when finished press the turn dial to return to the display screen.

How to find and download The Matrix General Drivers, DSD configuration guide, and Matrix Audio Remote app?

Find and download Matrix General Drivers, the DSD configuration guide, and their MA Remote download instructions at the following link