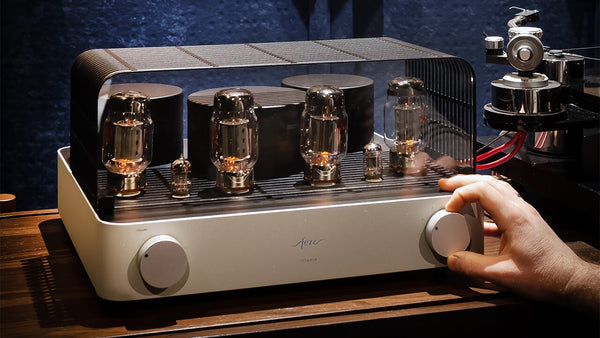
Vacuum Tube Maintenance & Installation Tips for Optimal Audio Quality
Read Time: Approx. 12 min.

TL;DR:
- Know when to replace tubes: Watch for warning signs like excessive noise, blown fuses, loss of glow, visual defects, degraded sound quality, or erratic volume changes
- Follow proper tube replacement procedures: Always unplug and let your amp cool down first, gently wiggle tubes out, align pins carefully when installing new tubes, and monitor for normal glow and function when powering back on
- Understand the three main tube types: Preamp tubes shape tone and boost weak signals, while power tubes provide the muscle needed to drive speakers
- Power tubes may require re-biasing: After replacing power tubes, you may need to adjust the bias to ensure the tubes operate at optimal voltage and performance
- Practice preventive maintenance: Store tubes in a cool, dry place in their original packaging, perform regular visual inspections, and keep spare tubes on hand for troubleshooting
Your Guide to the Care and Keeping of Vacuum Tubes
Ahh, the wonderful world of vacuum tubes. To know them is to love them. Before transistors and solid-state technology came into the picture, ushering in the modern age of hi-fi audio, the sonic world was ruled by the warm, distinct glow of vacuum tubes. While they've been replaced with fancier, high-tech components in many electronic devices, there is still a place for vacuum tube technology and a large group of audiophiles who adore and exclusively use them.
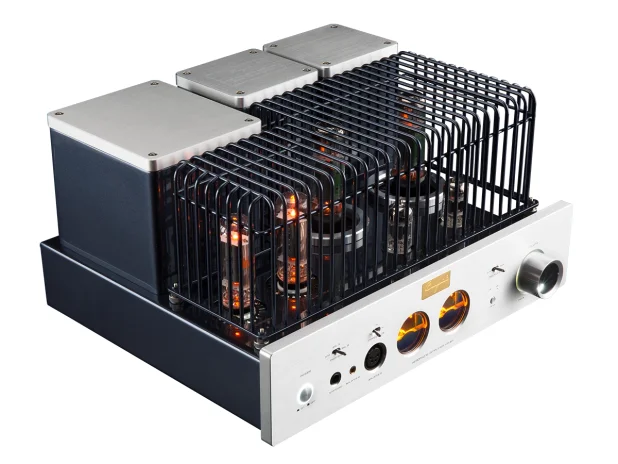
Today, many hi-fi audio brands still produce components with vacuum tubes, catering to the nostalgic and those simply seeking the warm, smooth, and musical "tube sound." From guitar amplifiers to audio amplifiers and preamplifier stages, vacuum tube amplifiers continue to thrive. With that comes the care and keeping of vacuum tubes. As with anything, vacuum tubes have a lifespan and require regular check-ups and replacements to ensure the amp continues to perform at its peak. Whether you're a seasoned audiophile or a novice with their first tube amp, we've got an exclusive guide with tips and tricks to swap tubes and maintain your tube amplifier for years of happy listening.
Signs Your Tubes Need Replacement
So you've got your tube amplifier but you're not quite sure whether your vacuum tubes need to be replaced. If you're questioning it, chances are they do and here's what you should look for:
Excessive Noise
Noise is never a good thing in hi-fi equipment, so the presence of unusual noise can indicate tube wear. Sounds to look out for include hissing, humming, crackling, static, or popping that gets worse at higher volumes. Some components will have noise to a degree, be it a low-level hum or microphonics, so it's important to use those ears to discern from run-of-the-mill sounds and anything unusual.
If an unusual noise is present, does it mean you need to run out and replace the tube right away? Not necessarily, but it's indicative of the tube's diminished capacity to process the audio signal cleanly.

Blown Fuse & Visual Defects
A blown fuse is one of the clearest signs that it's time for a tube replacement. If a fuse is blown out, it requires immediate attention and the amplifier should not be used until it is addressed and replaced.
If a tube does not emit the traditional warm glow when powered on (especially visible in a dark room), the filament may have burned out, and the tube is no longer functional. Other visual indicators of tube failure include a white/chalky coating inside the glass tube or a cloudy/hazy-like appearance. Loose parts rattling inside or broken elements also mean the tube has gone bad.
Loss of High-Quality Sound
Discerning ears can pick up on the slightest changes in sound quality. If you're ears are discerning enough, you may be able to pick up on a degradation in sound quality before any other signs of tube replacement are present.
Some sonic indicators include a muffled or distorted sound, a muddied low-end response, and a brighter-than-usual treble. Use your best judgment when identifying sonic changes. It's your component and only you know how it's truly supposed to sound.
Erratic Volume Changes
A tube nearing the end of its lifespan may cause the amplifier's volume to change. Signs to look out for include an amplifier producing no audio output, cutting in and out, or sound fluctuating drastically.

A Non-Functional Amp
The most obvious indicator that you've got a situation that needs to be addressed is a non-functioning amplifier. If the amplifier stops working altogether, you might have a tube failure. Start by examining the tubes, and if that doesn't solve the issue, consult the amp manufacturer or a skilled technician to address possible issues with the component itself.
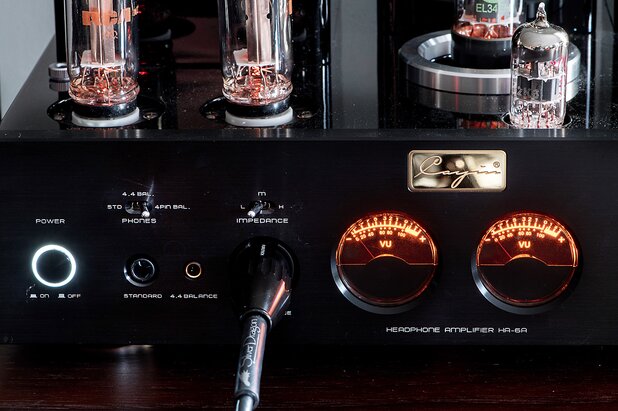
These are just a few of the most common signs your vacuum tubes need replacement. The lifespan of a vacuum tube isn't so cut and dry, so it can be hard to judge the need for replacement based on that alone.
Other things to look out for include red-plating when the anode is overheating, a burning smell or smoke, and unusual colors indicating a possible leakage.
If any of these symptoms appear, identify which tube is the problem and replace it to prevent further damage to the equipment. Keeping spare tubes and tube swapping can help confirm the diagnosis. Taking precautionary steps and routinely examining the health of your component will maintain its longevity, so you can enjoy years of smooth listening.
How to Change Tubes in a Tube Amplifier
Whether it's your first time or your hundredth time changing tubes, it can feel daunting, but in reality, it's nothing more than a quick DIY task. Nonetheless, it should be approached with care and meticulousness to avoid potential dangers from high-voltage circuitry.
1. Turn Off the Power & Unplug the Amplifier
Safety first! Disconnect the amplifier from the power source and unplug it–Don't just turn it off via a switch. If you just used the amp, wait several minutes for the tubes and internal components to cool down.
2. Remove Tube Retainers and Shield
3. Extract Old Tubes
With a firm grasp on the tube, gently wiggle it from side to side while pulling straight out. Never force a tube out of its socket or bend the pins excessively.
4. Prepare New Tubes
Remove the new tube from its packaging. Before inserting the new tube, carefully inspect it for physical damage and double-check that the replacement tube matches what is needed for each socket.
5. Insert New Tubes
Align the pins and key of the new tube to its specific socket orientation. With a firm grasp on the tube, gently wiggle and push the tube into place until snug. If you're having trouble inserting the tube, wiggle it side to side or slowly in a circular motion.
6. Power On and Monitor
Once the new tube is installed and properly fitted into place, reconnect the amplifier to its power source, switch it on, and observe the new tubes as they warm up.
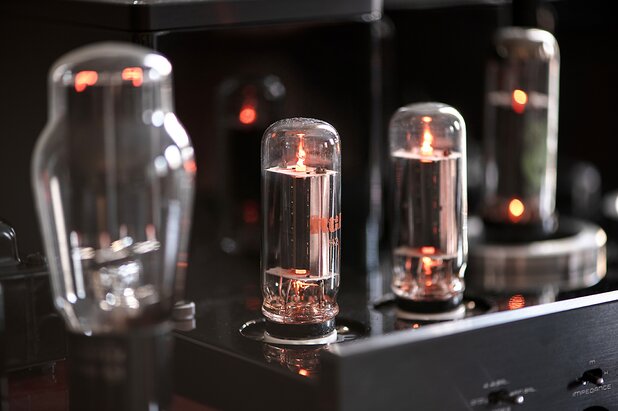
Watch for normal glow and listen for proper function. If you detect any issues, turn off the amplifier immediately and investigate further.
Biasing, If Needed: Depending on your amplifier, power tube replacements may require re-biasing to ensure proper electrical settings and performance. Biasing ensures the tube operates efficiently and safely at the correct plate voltage and plate current, maintaining sound quality and preventing tube damage.
Maintenance Tips and Troubleshooting
- Routine cleaning
- Visual inspections
- Proper storage
- Listen for changes
- Swap with known good tubes
Vacuum tubes are delicate and must be properly stored for years of enjoyment. Keep them away from moisture in a cool dry place. If possible, store tubes in their original packaging to protect them from physical damage. And if you're someone who is constantly tube rolling, consider storing them in a padded tube case for extra security.
How to Pick Vacuum Tubes
Know your Amp's Requirements
Arguably, the most important factor when picking vacuum tubes begins with the amplifier. Every amplifier is different, and using the correct tube that matches the specifications of your amp is the difference between disaster and delight. Most amplifiers are designed for specific power tube types and preamp tube types.
Only use tube types that match your amp's socket and voltage requirements for safe operation. If you're unsure of those requirements, check out your amp's manual for proper valve recommendations.
Vacuum Tube Basics
What are Vacuum Tubes?
Essentially, a vacuum tube (also called an electron tube) is a device that controls the flow of electrons in a vacuum-sealed glass enclosure. Vacuum tube technology dates back to the Edison Effect, discovered by Thomas Edison in the 1800s when he observed electric current flow in an evacuated glass bulb. Modern vacuum tubes can amplify, switch, or modify an electrical signal by controlling the flow of electrons between electrodes in a vacuum inside a sealed glass or, rarely, a metal envelope. This same principle that once powered early light bulbs now drives high-end audio equipment.
How Do Vacuum Tubes Work?
In the simplest vacuum tube, you'll find two main parts inside a gas or vacuum environment: A Cathode (also known as a heater) and an Anode (also known as a plate). They range in appearance, and depending on the type, some may contain additional elements like grids alongside the cathode and anode. Some may have one grid, others may have two, three, or four.
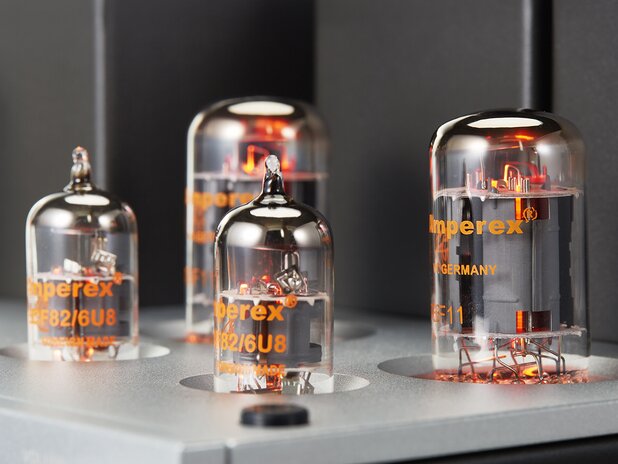
Inside the vacuum tube, a metal filament begins to heat up, and once heated, it enables the cathode to emit negatively charged electrons through thermionic emission–the process by which heated materials release electrons. These electrons flow to the positively charged anode creating electric current. The magical glow you see inside a tube is the heated cathode. In cases where a grid is present in the tube, it sits between the cathode and the anode and controls the flow of electrons from the two elements. Likewise, if there is no grid, the electrons move straight to the anode without any resistance.
Think of the grid like a window blind. When opened, the electrons flow freely from the cathode to the anode. When the grid is closed, the electrons cannot flow to the anode. So why do grids matter? And what part do they play in a vacuum tube? The grid is the control element in the equation. The grid is the control element in the equation, essential for amplifying signals and controlling the circuitry.
Vacuum Tube Components
- Cathode: A heated metal element that releases electrons when hot through thermionic emission
- Anode: A positively charged metal plate that attracts electrons. Outermost aperture that is usually gray or a dark color
- Grid: A spiral of fine, stiff wire wound around thicker, more substantial wires that suspend between the cathode and anode, controlling the flow of electrons
Types of Vacuum Tubes
We know that a typical vacuum tube is composed of three main parts: the cathode, anode, and grid. Beyond that, there are four basic types of vacuum tubes, each configured differently with their own operating principles:

Diode
A diode vacuum tube is composed of a cathode and an anode. Allows current to flow in only one direction, converting AC (Alternating Current) to DC (Direct Current).

Triode
A triode vacuum tube is composed of three elements: a cathode, an anode, and a control grid positioned between the cathode and anode. The control grid controls the flow of electrons inside the vacuum tube. A negative voltage is applied to the grid, stopping the electron flow from the cathode to the anode. As the grid is made positive, it acts as a shutter, opening and allowing more electrons to flow to the anode.
When a control grid is placed between the cathode and anode, it produces capacitance. Capacitance occurs when you have two plates close to each other. This interelectrode capacitance can affect performance, which is why capacitors are often used in tube circuitry to manage these effects.

Tetrode
A tetrode vacuum tube is composed of four elements: a cathode, an anode, a control grid, and an additional grid called the screen grid, placed between the control grid and the anode. The screen grid reduces unwanted capacitance and improves high-frequency performance.
By inserting a screen grid with a positive voltage into the tube, an electrostatic shield is created between the control grid and the anode, which lowers the interelectrode capacitance. This allows the tube to function as an oscillator and amplify at much higher frequencies.
The wires of both grids are perfectly aligned with each other, so they don't obstruct the electron flow. By doing so, secondary emission is dramatically reduced, meaning electrons aren't hitting the anode and bouncing back into the tube, causing issues.
Pentode
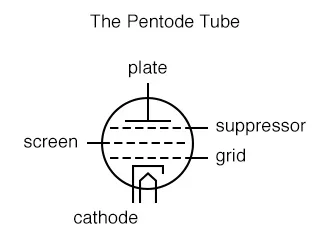
A pentode vacuum tube is composed of five elements: A cathode, an anode, a control grid, a screen grid, and a suppressor grid. The suppressor grid stops secondary emission from occurring, so any electrons that want to hit the anode and rebound back into the tube are stopped.
Preamp Tubes, Power Tubes & Rectifier Tubes
In most high-end audio applications, you'll encounter three different types of tubes: Preamp Tubes, Power Tubes, and Rectifier Tubes. Each type fulfills a certain role with unique characteristics and impacts on your overall listening experience.
Matching preamp and power tubes unlocks a world of sonic possibilities. Experimenting with different combinations is much of the joy in tube rolling. It's like creating the perfect recipe: A little bit of this, a little bit of that, and boom, the desired sound quality is achieved. There is no right answer, just whatever sounds good to your ears.
What is a Preamp Tube?
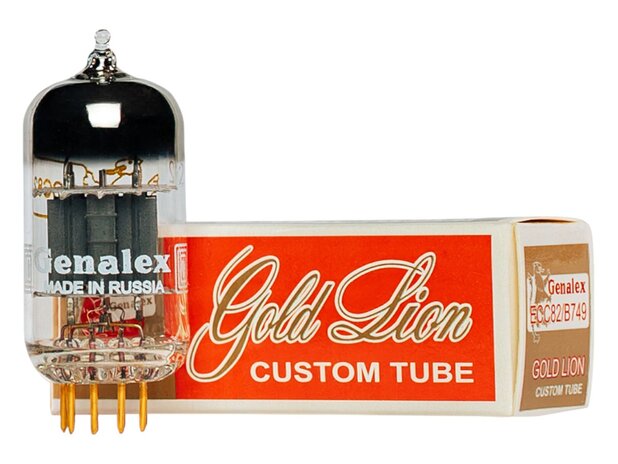
Preamp tubes are small tubes that sit at the first stage of amplification, playing a crucial role in shaping the overall sound quality. They take the weak signal and boost it to a level suitable for driving the power amp section of a hi-fi amplifier, effectively amplifying signals before they reach the power stage.
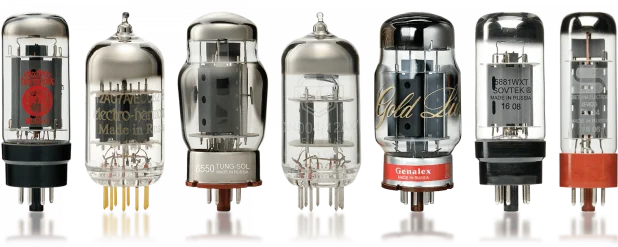
Preamp tubes like the popular 12AX7, 12AT7, and 12AU7 (ECC82) primarily influence gain, tonal warmth, detail, and dynamic character. These tubes are widely used in guitar amplifiers and high-end audio amplifiers. They can add warmth, smoothness, or richness to the sound, and some preamp tubes even excel at offering a low-noise floor for clarity and detail.
- 12AX7 (ECC83): Versatile tube that offers a wide range of tonal possibilities, from bright to smooth
- EF86: Known for its clean, chiming tones with a touch of high-end sweetness. Perfect for circuits seeking clear articulation
- 5751: Lower gain than 12AX7, delivering a tighter low-end and more headroom. Perfect for players seeking precision and clarity
- 12AT7 (ECC81): Cleaner and lower in gain than the 5751 and 12AX7. Great for achieving smooth, clean tones and will add headroom to your amp
Preamp Tubes
What is a Power Tube?
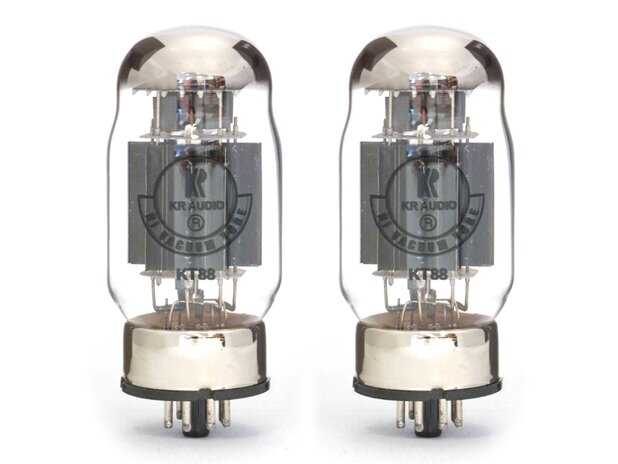
Power tubes are larger, higher-current tubes that amplify the signal from the preamp stage to a level that can drive loudspeakers. They're the powerhouse of tubes–the muscle behind the sound–that sculpt the signal and amplify it with authority. These high-power tubes are usually the first tubes to go because they're exposed to the highest voltage and packed with so many elements in proximity.
The general rule of thumb with power tubes is that the bigger the amplification stage, the bigger the power tubes need to be. And with that, the bigger the power tube, the more headroom you will have. Popular power tubes include the 6L6, EL34, 6650, and KT88. These tubes influence headroom, frequency response, punch, and harmonic structure.
- 300B: Exceptionally warm, smooth, and natural sound with lush midrange and lifelike musical detail.
- 6L6: Rich, warm tone with a smooth distortion and musical sound quality. Sounds wider and more lush than EL34. Excel in classic rock, jazz, and country music, where clean tones must be brilliant and clear.
- EL34: Tighter, punchier sound quality and clear articulation. More focused and controlled than 6L6. Sharp, responsive, precise sound that's gritty enough for blues, funk, and rock genres.
- 6550 & KT88: A powerful blend of warmth and clarity that delivers a bold, assertive sound with a touch of smoothness. Best suited for devices that require ample headroom.
Power Tubes
What is a Rectifier Tube?
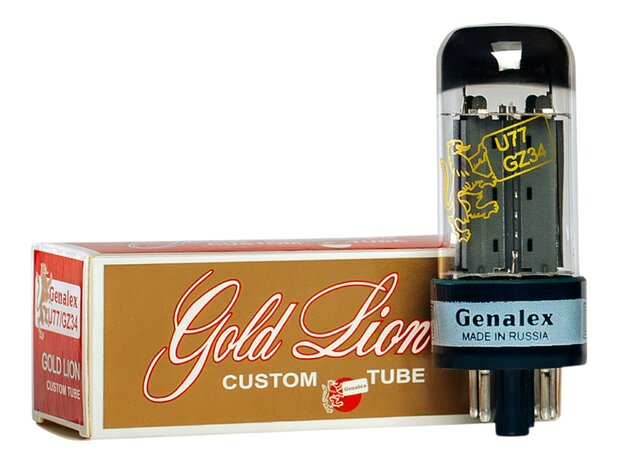
Unlike preamp and power tubes, rectifier tubes do not amplify the audio signal. Instead, they convert alternating current (AC) from the power transformer into the direct current (DC) required by amplifier circuits through the power supply. Their characteristics can subtly impact the feel and transient response of the amplifier.
Rectifier Tubes
Common Tube Questions
1. What is tube rolling?
Tube rolling is the practice of swapping out vacuum tubes in a tube amplifier, usually to experiment and fine-tune the sound quality of the system. This is not only helpful in optimizing the tone of your amplifier, but it's also one of the many joys associated with using tubes. Many audiophiles find great fun in tube rolling. It's not meant for replacing faulty tubes, but rather for customizing the tonality of your amp, whether that's more warmth and musicality or clarity and detail.
Preamp tubes are one of the easiest tubes for tube rolling. They're self-biasing and require no additional adjustments, making them a breeze to work with. Power tubes require resetting the bias, making tube rolling still an option, but it requires slightly more steps. Tube rolling can breathe new life into an otherwise ordinary-sounding amplifier.
2. What do the numbers and letters in a tube's name mean?
More often than not, you'll see either a combination of numbers and letters or just digits in a tube name. For instance, let's examine the 12AX7—the number 12 stands for the filament voltage. AX is the model number, and 7 is the number of internal elements, including the filament. In cases where there are letters after the name, say a 6L6GC, it can refer to different voltage capabilities of the tube.
3. What is amplifier bias?
Biasing involves adjusting the current flow to the tubes, ensuring they operate within their optimal performance. The voltage of an amplifier is adjusted to the control grids of the power tubes so the tubes draw the required operating current. This adjustment is crucial because each tube type may have slightly different current requirements. Proper biasing not only extends the life of the tubes but also maintains the amplifier's tonal integrity.
In cases where you want to amplify a weak signal, the tube can be biased, making the grid slightly positive. The term bias itself means the average, steady-state voltage applied to the control grid, assumed to be negative.
Related Videos
These 3 Fezz Audio Tube Amps Have Incredible Toroidal Tech
Our top 3 Tube Headphone Amps & Why We Love Them
The Secret 300B Tube Amp Head-Fi Audiophiles Don't Know About

